This is a sandbox demo. It is intended to help you explore a specific TwikBot concept in isolation, using a pre-built product graph you can inspect and experiment with freely.
Overview
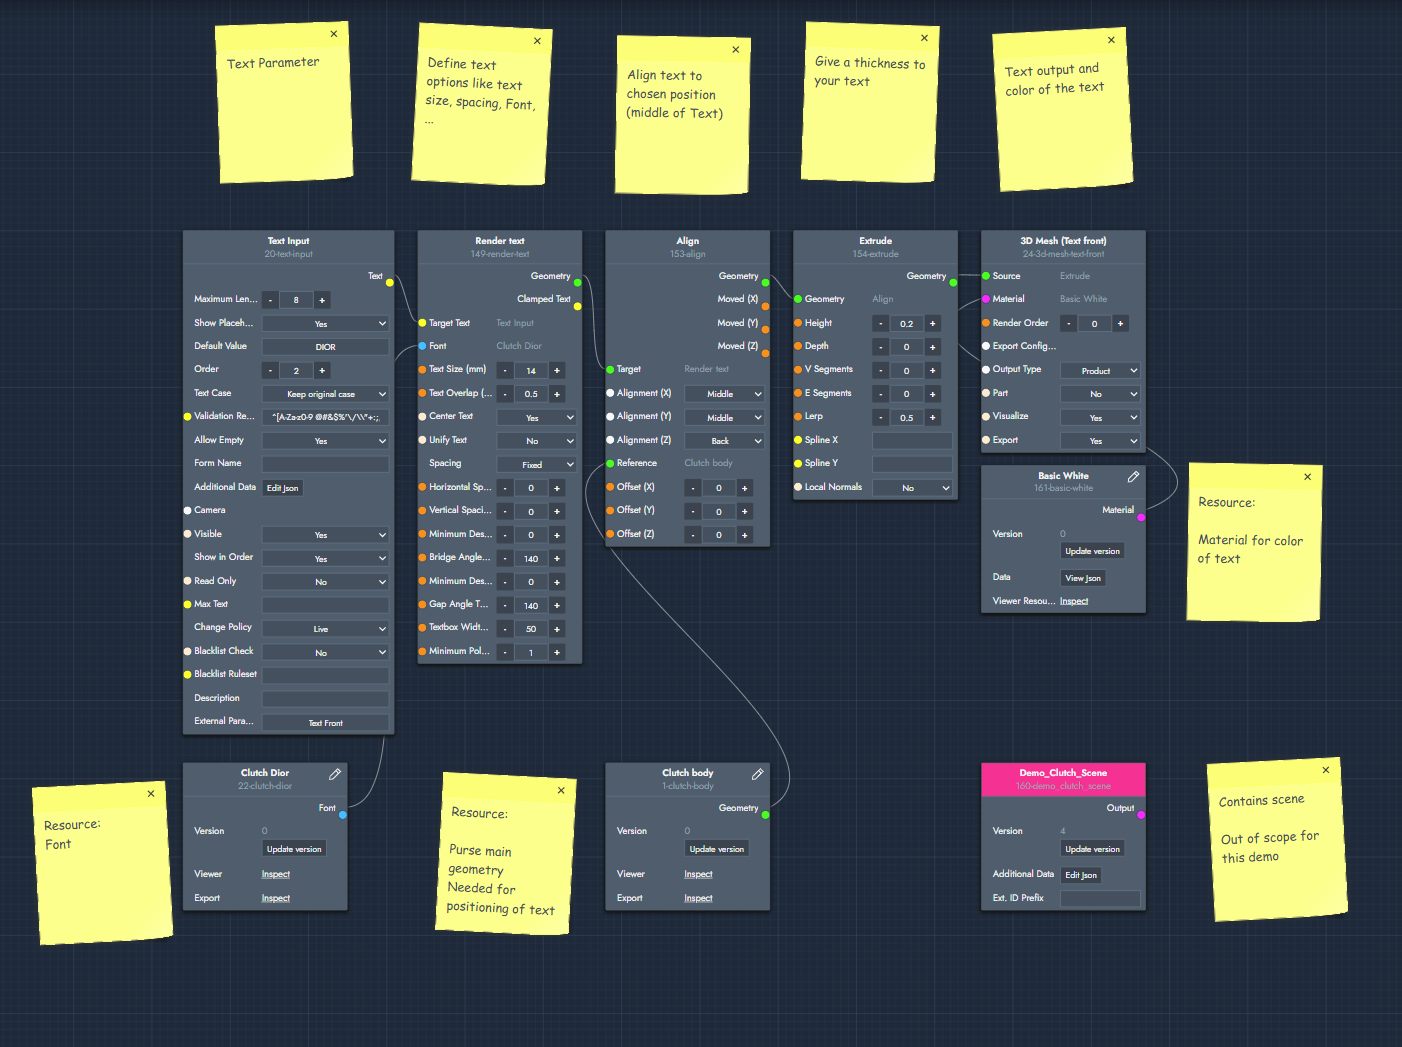
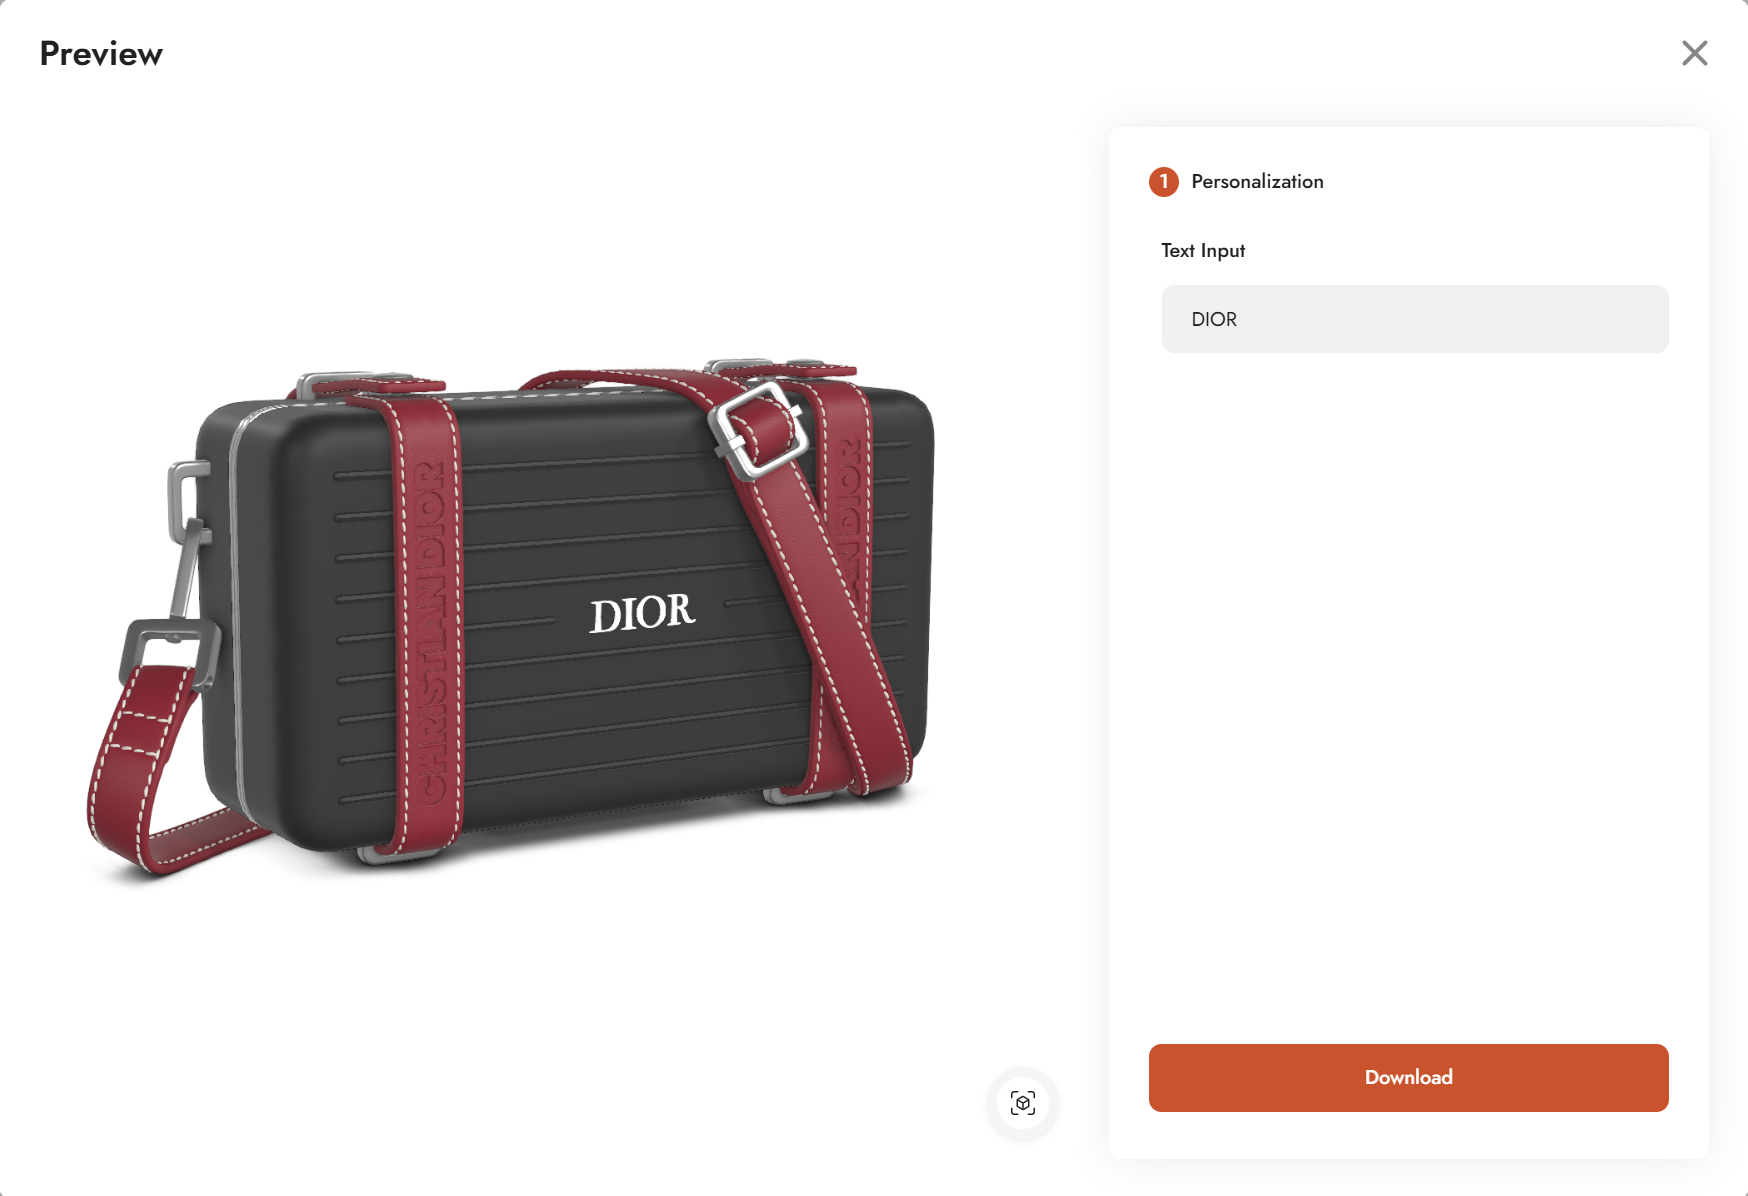
Personalization Basic - Demo shows the minimum setup required to add text personalization to a product in TwikBot. The demo uses a luxury clutch bag as its subject, where the end user can type any text and see it appear on the bag in real time.
The configurator consists of a single step (Personalization) and exposes one UI control: a text input field. The entered text is rendered as 3D geometry, positioned on the clutch body, and displayed in the 3D viewer with a material applied.
Product graph
The graph file for this demo can be downloaded and imported directly into TwikBot Create.
Nodes used
|
Node |
Reference |
Purpose |
|---|---|---|
|
Text Input |
The UI element where the end user types their text. Supports default values, text case rules, and input validation via regex. |
|
|
Render Text |
Converts the text string into a 3D shape. Controls text size, font, spacing, and the area the text is allowed to occupy in 3D space. |
|
|
Align |
Positions the rendered text relative to another geometry using bounding box alignment. Used here to place the text on the clutch body. |
|
|
Extrude |
Adds thickness to the flat text shape, turning it into a proper 3D object. |
|
|
Font Resource |
Holds the uploaded font file (.ttf) used by the Render Text node to shape the characters. |
|
|
3D Mesh Resource — Clutch body |
The geometry of the clutch bag body. Used as the reference for positioning the text via the Align node. |
|
|
Material Resource — Basic White |
The material applied to the text geometry in the output node, controlling its color and appearance. |
|
|
Macro — Demo_Clutch_Scene |
N/A |
Contains the rest of the clutch scene geometry. Out of scope for this demo, but included to complete the scene. |
|
3D Mesh — Text Front |
The final output node. Renders the extruded text with the material applied in the 3D viewer. |
Graph explained
This graph shows how to set up a text personalization feature using a small chain of nodes. Follow the steps below to understand the data flow.
-
Text Input
Start with a Text Input parameter node. This is the UI element the end user sees: a plain text field in the configurator sidebar. Set a default value to pre-fill the field when the configurator loads. You can also enforce a text case (capitals, lowercase, or free input) and restrict which characters are accepted using a validation regex. For example, the pattern(^\d+(?:[.,]\d+)?(?:°|%|x)?$)limits input to numbers and specific symbols only. You can test regex patterns at regex101.com. -
Font Resource
Add a Font Resource node containing your uploaded font file in .ttf format. Many free fonts are available online. This resource is connected to the Font input of the Render Text node. -
Render Text
Add a Render Text node. This converts the text string from the Text Input into a flat 3D shape (geometry). The most important inputs here are text size and textbox width, which together define how large the text appears and how much space it is allowed to occupy in 3D. Connect the Text Input to the Text input and the Font Resource to the Font input. -
Align
Add an Align node to position the text in the scene. Connect the rendered text geometry to the Target input and the Clutch body mesh resource to the Reference input. The Alignment setting determines where on the reference bounding box the text is placed. Note that the axis labels (left, front, back, top) refer to the world axis system, not the visual orientation of the object. -
Extrude
Add an Extrude node and connect the aligned text geometry to it. This adds depth to the flat text shape, turning it into a proper 3D object with visible thickness. -
3D Mesh Output (Text Front)
Add a 3D Mesh output node. Connect the extruded text geometry as the Source and the Basic White material resource as the Material. This output node is what appears in the 3D viewer, rendering the personalized text on the clutch with the chosen material applied.