This is a sandbox demo. It is intended to help you explore a specific TwikBot concept in isolation, using a pre-built product graph you can inspect and experiment with freely.
Overview
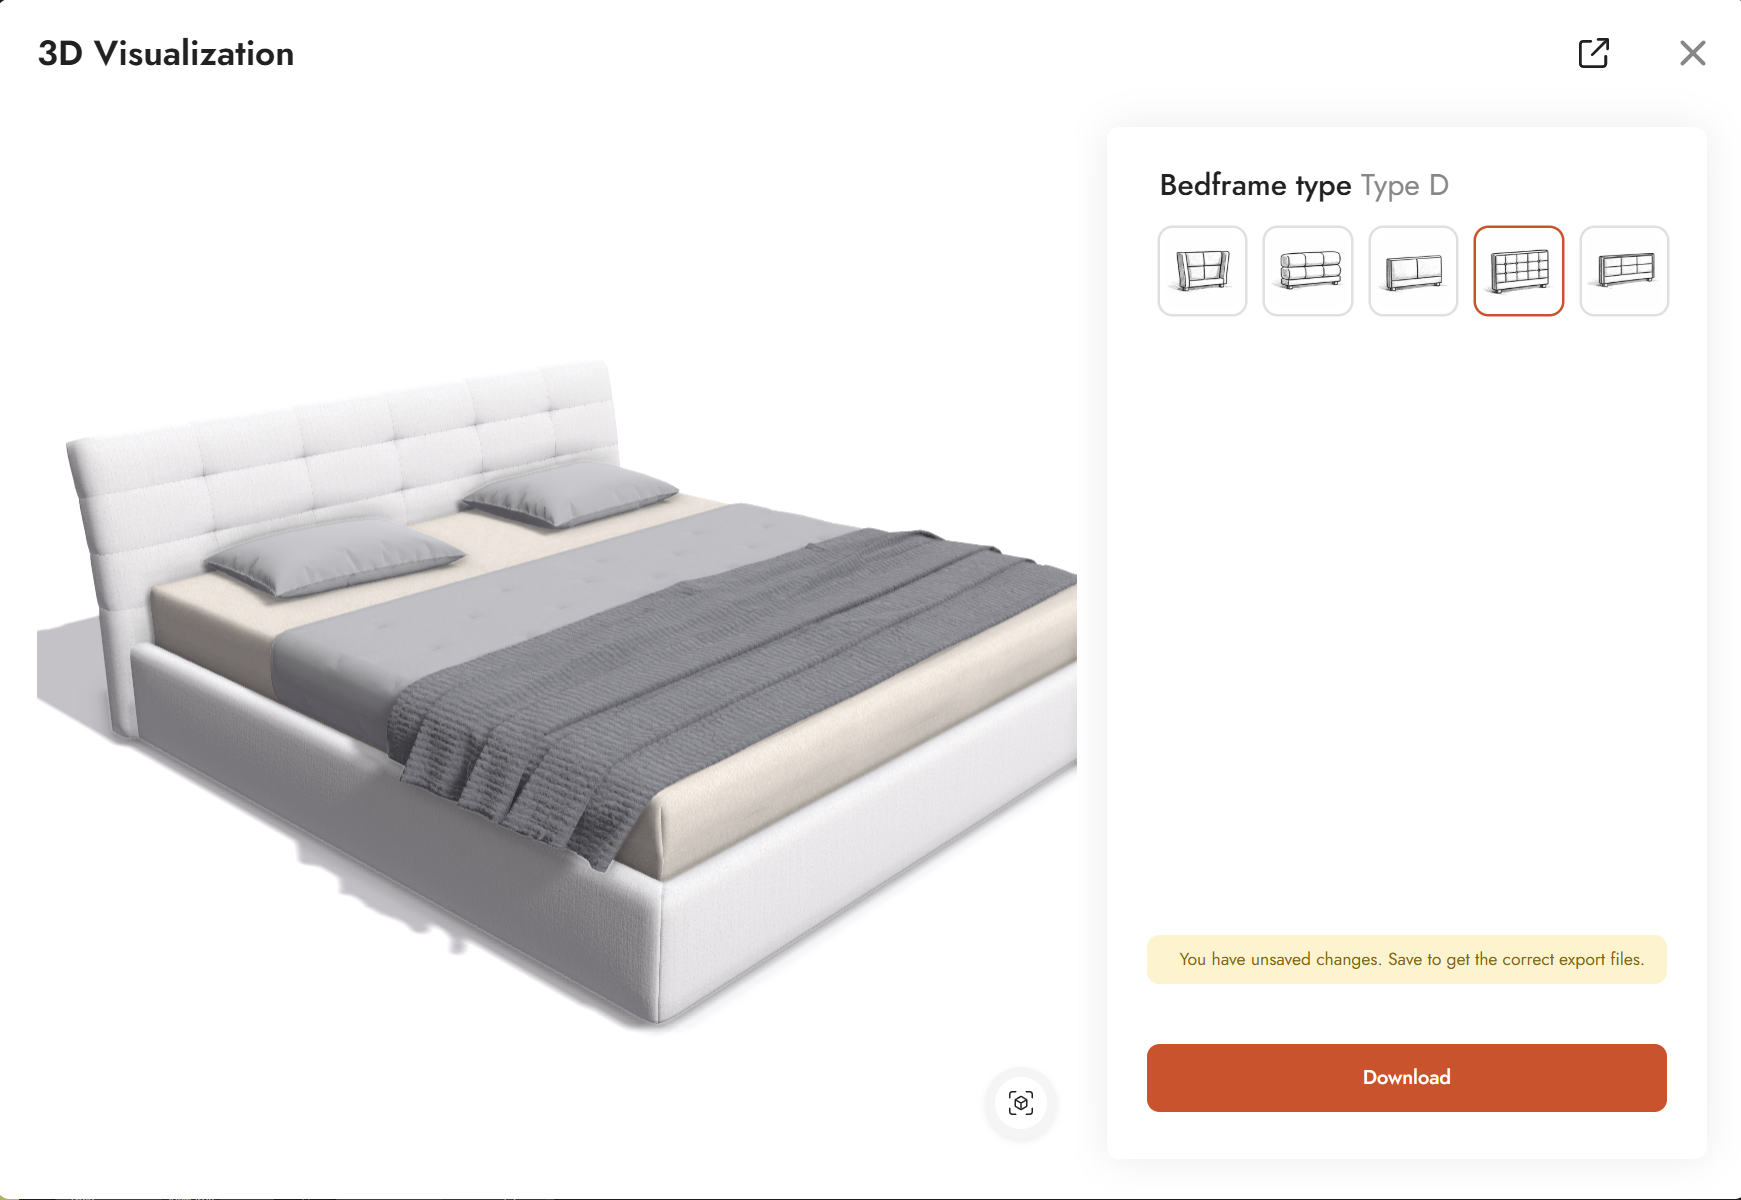
Switching Basic - Demo shows how to swap both geometry and material simultaneously based on a single option selection. The demo uses a bed as its subject, with five selectable bedframe types (Type A through Type E). Selecting a type swaps the headboard geometry and applies the corresponding fabric material in one step.
The configurator exposes a single control: an icon picker for the bedframe type. Each option uses a small image as its icon. Switching options updates both the visible geometry and the material in real time via two Value Interpretation nodes driven by the same Option List.
Product graph
The graph file for this demo can be downloaded and imported directly into TwikBot Create.
Nodes used
|
Node |
Reference |
Purpose |
|---|---|---|
|
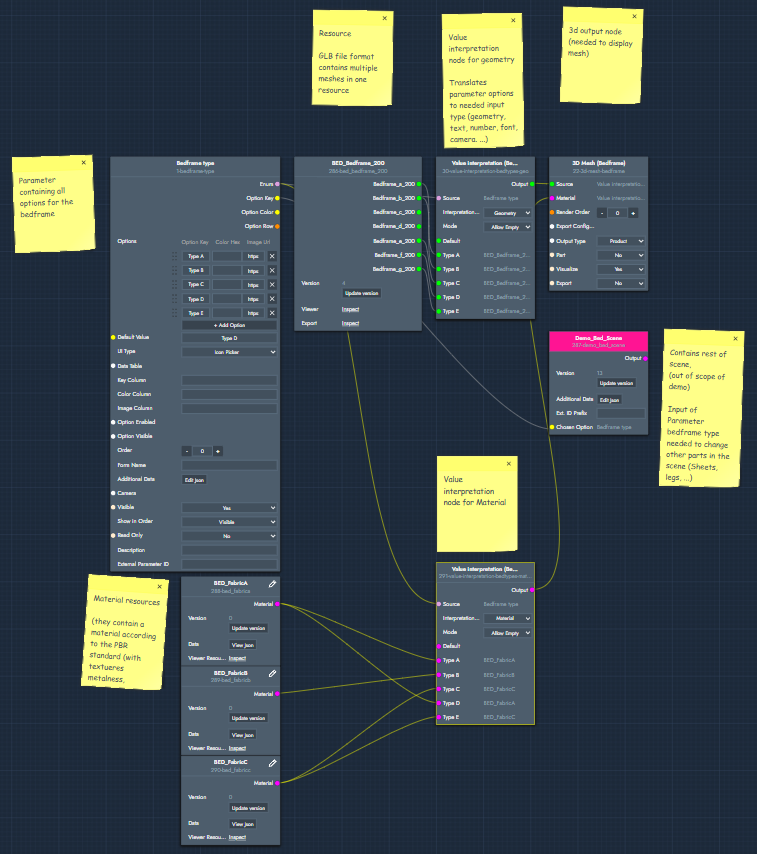
Option List — Bedframe type |
The UI element exposing the five bedframe options (Type A to E) to the end user as an icon picker. Each option can carry an image URL used as its icon. |
|
|
GLB/GLTF Resource — BED_Bedframe_200 |
A single GLB file containing multiple geometry variants for the bedframe types. GLB files can store multiple meshes in one resource. |
|
|
Value Interpretation — Bedtypes geo |
Translates the selected option into the corresponding geometry output from the GLB resource. Set to Geometry mode. |
|
|
Material Resource — BED_FabricA / B / C |
Three PBR material resources (with textures for color, roughness, and metalness) mapped to the different bedframe types. |
|
|
Value Interpretation — Bedtypes material |
Translates the selected option into the corresponding material resource. Set to Material mode. |
|
|
Macro — Demo_Bed_Scene |
N/A |
Contains the rest of the bed scene geometry (sheets, legs, etc.). Out of scope for this demo, but included to complete the scene. Also receives the Bedframe type option as an input to keep other scene parts in sync. |
|
3D Mesh — Bedframe |
The final output node. Receives the active geometry from the geometry Value Interpretation and the active material from the material Value Interpretation, and renders them in the 3D viewer. |
Graph explained
This graph shows how to switch both geometry and material together using a single option selection. The key pattern is two Value Interpretation nodes, both driven by the same Option List. Follow the steps below to understand the data flow.
-
Option List (Bedframe type)
Start with an Option List parameter node. Add one option per bedframe type (Type A through Type E). Each option can include an image URL that is displayed as the icon in the UI picker. The selected option key is the single input that drives everything else in this graph. -
GLB/GLTF Resource (BED_Bedframe_200)
Add a GLB resource node pointing to your GLB file. A GLB file can contain multiple meshes in a single resource, one per bedframe variant. Each mesh is exposed as a separate output on the resource node. -
Value Interpretation (geometry)
Add a Value Interpretation node. Connect the Option List enum output to the Source input. The node will populate with your option keys. Set the Interpretation type to Geometry, then connect each GLB mesh output to the matching option row. When an option is selected, this node outputs the corresponding geometry. -
Material Resources
Create a material resource for each fabric variant (BED_FabricA, BED_FabricB, BED_FabricC) from the Resources tab in the toolbar. Material resources follow the PBR standard and include textures for color, roughness, and metalness. -
Value Interpretation (material)
Add a second Value Interpretation node. Connect the same Option List enum output to its Source input. Set the Interpretation type to Material, then connect each material resource to the matching option row. When an option is selected, this node outputs the corresponding material. -
3D Mesh Output (Bedframe)
Add a 3D Mesh output node. Connect the geometry Value Interpretation to the Source input and the material Value Interpretation to the Material input. This output node renders the active bedframe variant with its matching fabric material in the 3D viewer.