Loading a Product
-
In the Content Browser, navigate to Plugins → Twikit Plugin C++ Classes → A_Twikit_Plugin → Public and drag
TwikitActorinto your level. -
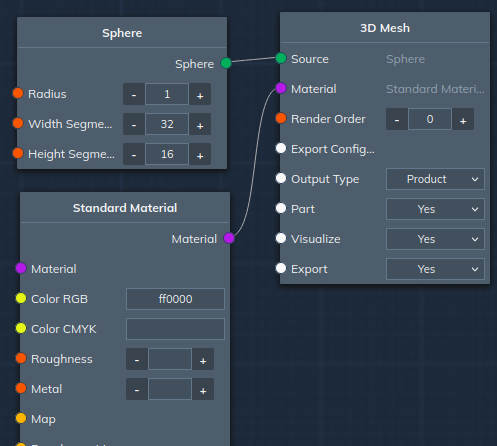
Select the actor (e.g. in the Outliner panel). In the Properties panel, find the Twikit section, enter a descriptor path and press Enter (or click Reload Product). To find a descriptor for a product, open the product's preview page, open the browser console, and filter the Network tab on
json. The view descriptor URL follows the patternhttps://cdn.twikit.com/projects/xx/products/xxxxxxxx/descriptors/xxxxxxxx.export.json. Right-click and copy as URL. If nothing appears after loading the descriptor, try increasing the Scale property in the Twikit section (e.g. set it to 100). Do not use Unreal's built-in actor scale for this — see the Scaling section for details. The plug-in writes logging output to the Output Log panel. Check there for errors, warnings, or general status information. -
To interact with product properties, start the game using the Play button. Fly to the product geometry and click on it. The properties panel will appear in the top-left corner.
New Content in Scene
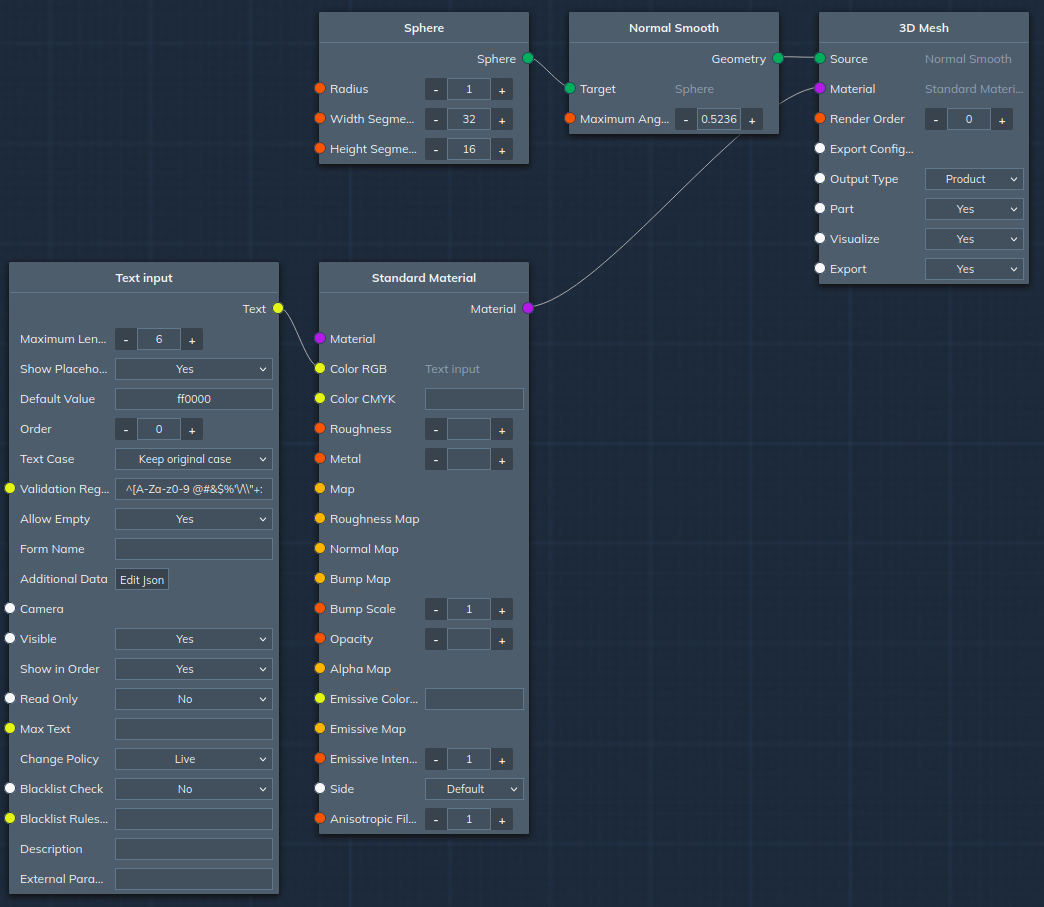
When a product is loaded into a TwikitActor, any 3D output components defined in the product are added to the scene as procedural meshes. The plug-in translates materials from those components into Unreal Engine materials, added as dynamic material instances using base templates provided by the plug-in.
Parameters in the product are picked up by the plug-in and can be accessed in game mode (when TwikitGameMode is active) by clicking on the actor.
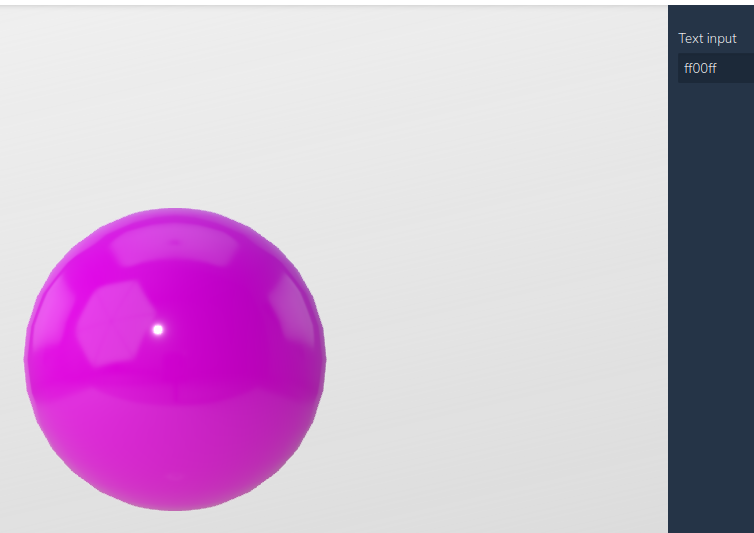
The same product rendered in WebGL:
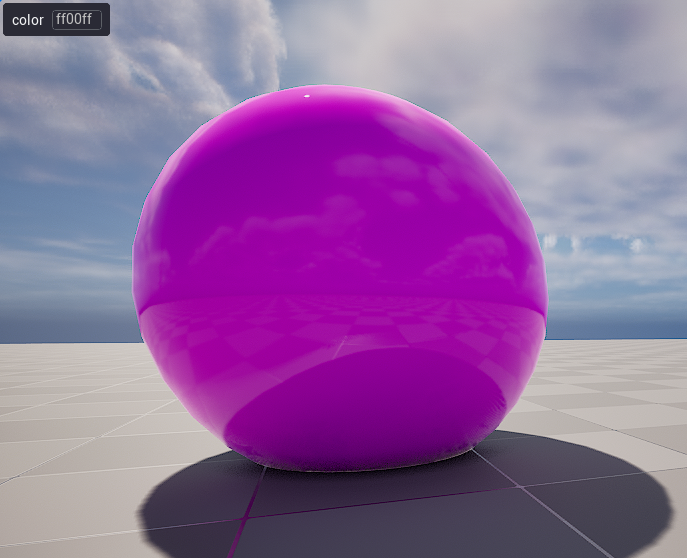
And in Unreal Engine:
The parameter popup is primarily intended for development. In production the scene should be connected to a custom UI. The parameter API allows getting and setting parameter values. A WebSocket hook is also available to connect to the Twikit Platform so the web-based UI can drive a Unreal Engine scene — see the Remote page for details.
Existing Content in Scene
The plug-in supports three ways of working with content already present in a scene:
-
Using an Unreal Engine mesh directly in a product
-
Overriding an existing Unreal Engine mesh with one generated by a product
-
Setting material parameters on materials already in the scene
Note that the current version is a proof of concept; this functionality is expected to solidify into dedicated Unreal Engine nodes in a future release.
Importing a UE Mesh into a Product
Use a Resources Fetcher node with the following URL format:
<actor name>(.section_index).umesh
The section index is optional. For a static mesh named SM_AutomotiveTP_Car:
SM_AutomotiveTP_Car.umesh      // import the entire mesh
SM_AutomotiveTP_Car.1.umesh    // import only the mesh for material slot 1
Note that the mesh name refers to the name of the static mesh asset, not the label shown in the editor Outliner. The Outliner label is editor-only and is not available at runtime.
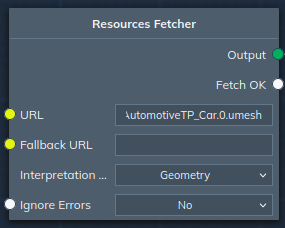
Allow CPU Access must be enabled for mesh imports to work. This setting is found in the mesh editor under General Settings → Advanced → Allow CPU Access.
Overriding a UE Mesh
To override a UE mesh with one generated by the product, set the following on the 3D Export node:
<actor name>(.section_index).umesh
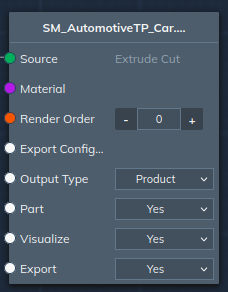
The naming convention is the same as for importing. If a material is assigned to the export node it will be created; otherwise the material already on the overridden mesh will be used.
Overriding UE Materials
Use the material override output component:
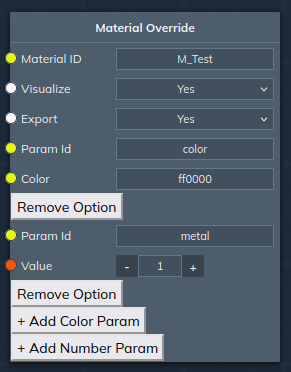
The plug-in matches all overrides to existing materials and applies them. Currently only the best-matching override is applied per material, meaning multiple overrides on the same material cannot be active simultaneously. Material ID supports the * wildcard; best-matching is determined by the most characters matched. For example, if the scene contains a material M_CarPaint and you have overrides named M_Car* and M_CarPaint, the latter will be applied.
Camera Control
To use camera settings from the product, or to control the camera remotely, add a TwikitPawn to the scene. Set Auto Possess Player to Player 0 so the pawn replaces the default pawn. TwikitPlayerController must also be active — this is automatically the case when TwikitGameMode is set as the default game mode.
Camera settings can be adjusted in the Camera section of the pawn.
Note for editor use — for smooth remote control inside the Unreal Editor, uncheck Use Less CPU When in Background in the editor settings. Without this, rotation updates will be choppy. A packaged game running fullscreen and focused will always receive smooth updates.
As of plug-in version 39 and TwikBot core version 6.4.1, rotation and zoom in an Unreal Engine scene can be controlled using the web canvas as a trackpad. This requires the active pawn to be a TwikitPawn.